MapSource GPS Garmin
We put you on the map
Cartography is the art and science of making maps. We have a team of cartographers and engineers who develop digital geographic data that can be used in a variety of our products. You'll see mapping detail that will supplement your unit's existing basemap and improve navigation.
MapSource®
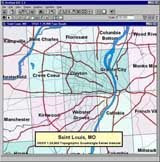
MapSource products provide geographic data in CD-ROM/DVD-ROM format that can be viewed on a PC. Additionally, some Garmin® units can accept map downloads from various MapSource products to augment the detail already on your Garmin GPS basemap.
All MapSource products include the trip and waypoint manager functions for transferring waypoints, routes, and tracks. Your preference for map detail and your specific activities will determine which MapSource product is right for you. MapSource gives you the flexibility to select the mapping coverage you need.
While using MapSource, the trip and waypoint planning function is compatible with nearly all Garmin GPS systems. The map transfer feature is compatible with numerous Garmin GPS units—please check your specific Garmin GPS unit and MapSource product for compatibility.
For those units that accept the map transfer feature, users can either download MapSource CD- ROM/DVD-ROM content to data cards or directly to their units depending on the GPS product they own. To download information directly to your GPS, simply connect your Garmin GPS to your PC using a compatible PC serial interface cable or USB interface cable (depending on your model). Select the map areas on screen, and with the click of the mouse, the information downloads to your GPS. Some units require a Garmin data card to download. Garmin offers a variety of blank data cards, including an 8MB, 16MB, 32MB, 64MB, 128MB and 256MB. Choose the size that best fits your required coverage area (Note: Some blank card sizes will not be compatible or recommended with some Garmin mapping units).
When using a locked MapSource product, the real-time track plotting function will work only with a valid unlock code for the GPS unit being used (not all units will be compatible with this). Each MapSource product is sold separately; however, more than one product can be used and downloaded into a Garmin-compatible unit. Note the MapSource Application will not support real-time tracking any longer. If you have the MapSource product installed on your PC, though, download Garmin's nRoute software from the Garmin website for no charge and use it (on that same computer) for real-time tracking with a compatible unit.
MapSource System Requirements
IBM-compatible PC running Windows 2000 or Windows XP operating system; 32MB RAM minimum; between 300 MB and 1.5GB free hard disk space; CD-ROM drive; available serial port; 256 color display adapter and monitor (24 bit recommended); and mouse or other pointing device; PC Interface cable. Internet access is also recommended to make use of the unlock process.
Download File : Part1, Part2, Part3
Password : free-gis-archive.blogspot.com
Programming ArcObject with VBA
Introduction
This book is designed for ArcGIS users who want to get a quick start on programming
ArcObjects. Both ArcGIS and ArcObjects are products developed and distributed
by Environmental Systems Research Institute Inc. (ESRI), ArcObjects is the development
platform for ArcGIS, a software package for managing geographic information
systems (GIS). Ideally, users should learn ArcObjects before using ArcGIS,
but that is not the case in reality. Users use ArcGIS first through its toolbars and
commands. It is easier to follow the user interface in ArcGIS than to sort out objects,
properties, and methods in code. The topic of ArcObjects usually emerges when
users realize that programming ArcObjects can actually reduce the amount of repetitive
work, streamline the workflow, and even produce functionalities that are not
easily available in ArcGIS.
How can users learn programming ArcObjects efficiently and quickly? Perhaps
surprising to some, the answer is to apply what users already know about ArcGIS
to programming ArcObjects.
basics, and customization. This book adopts Visual Basic for Applications
(VBA) for programming ArcObjects. Because VBA is already embedded within
ArcMap and ArcCatalog, it is convenient for ArcGIS users to program ArcObjects
in VBA. The following summarizes the major topics covered in the first three
chapters:
• Chapter 1: ArcObjects — Geodatabase, ArcObjects, organization of ArcObjects,
the help sources on ArcObjects, and the Geoprocessing object.
• Chapter 2: Programming Basics — Basic elements, writing code, calling subs and
functions, Visual Basic Editor, and debugging code.
• Chapter 3: Customization of the User Interface — Creating a toolbar with existing
commands, adding a new button and tool, adding a form, and making basic
templates.
Chapters 4 through 14 discuss programming ArcObjects for solving common
GIS tasks. Organized around a central theme, each chapter has three parts. The first
part is a quick review of ArcGIS commands on the topic; the second part discusses
objects that are related to the theme; and the third part presents sample macros and
Geoprocessing macros for solving common tasks under the theme. This combination
of ArcGIS commands, ArcObjects, and sample macros can effectively relate the
user’s experience of working with ArcGIS to programming ArcObjects.
The CD that accompanies this book contains 95 sample macros stored in the
VBA_programs folder by chapter. Each sample macro starts with a short description
of its usage and a list of key interfaces and members (properties and methods). These
are followed by the listing and explanation of code. Many macros are divided into
two or more parts to better connect the code lines and their explanation. Stored as
text files, these sample macros can be easily imported to Visual Basic Editor in either
ArcMap or ArcCatalog to view and run.
The companion CD also includes 33 Geoprocessing macros that are new in this
second edition. These macros are stored in the GP_programs folder by chapter. The
Geoprocessing object is a new ArcObjects component that supports the execution of
hundreds of Geoprocessing tools in a scripting language such as VBA or Python. These
tools are the same as in the ArcToolbox application of ArcGIS Desktop. The Geoprocessing
object is a “coarse-grained” object, which is simpler to use than a “fine-grained”
object. Therefore it allows users who do not understand all the details of ArcObjects
to run macros. To separate them from “regular” VBA macros, Geoprocessing macros
are included in “boxes” in Chapters 4 through 7 and in Chapters 9 through 14.
All sample macros in the text have been run successfully in ArcGIS 9.2. The
companion CD contains datasets for the test runs, which are stored by chapter in
the Data folder. Two notes must be made about use of the sample macros. First,
ArcGIS 9.1 or 9.2 is needed to run the macros. Second, the Data folder is coded in
the sample macros as residing on the C drive (for example, c:\data\chap4). If the
folder is stored on a different drive (for example, the G drive), then the path should
be changed (for example, g:\data\chap4) before running the macros.
The following summarizes the major tasks covered in each chapter:
• Chapter 4: Dataset and Layer Management — Add datasets as layers, manage
layers and datasets, and report geographic dataset information.
• Chapter 5: Attribute Data Management — List fields, add or delete fields, calculate
field values, and join and relate tables.
• Chapter 6: Data Conversion — Convert shapefile to geodatabase, convert coverage
to geodatabase and shapefile, perform rasterization and vectorization, and add XY
data.
• Chapter 7: Coordinate Systems — Manipulate on-the-fly projection, define the
coordinate system, perform geographic transformation, and project datasets.
• Chapter 8: Data Display — Display vector data, display raster data, and create a
layout page.
• Chapter 9: Data Exploration — Perform attribute query, perform spatial query,
combine attribute and spatial queries, and derive descriptive statistics.
• Chapter 10: Vector Data Operations — Run buffer, perform overlay, join data by
location, and manipulate features.
• Chapter 11: Raster Data Operations — Manage raster data and perform local,
neighborhood, zonal, and distance measure operations.
• Chapter 12: Terrain Mapping and Analysis — Derive contour, slope, aspect, and
hillshade; perform viewshed analysis; perform watershed analysis; and create and
edit triangulated irregular networks (TIN).
• Chapter 13: Spatial Interpolation — Perform spatial interpolation and compare
interpolation methods.
• Chapter 14: Binary and Index Models — Build binary and index models, both
vector and raster based.
Download File
Password : free-gis-archive.blogspot.com
Google Earth Pro Gold
(Google earth pro bisa save image dengan resolusi tinggi (4800x3847), save kedalam format video, bandingkan disini)
 For professional and commercial uses.
With Google Earth Pro, it’s easy to research locations and present your discoveries. In just a few clicks, you can import site plans, property lists or client sites and share the view with your client or colleague. You can even export high-quality images to documents or the web.
Annotate and visualize
Represent your location-based data using 3D drawing tools, or transfer up to 2,500 locations by address or geospatial coordinates from a spreadsheet. The GIS Data Importing Module lets you incorporate GIS data in file formats such as .shp and .tab. Examples include parcel, demographic, and 3D building data.
Share and analyze
Share your Google Earth views and data representations with your clients as a KML, Google Earth‘s original file format. With your upgraded Pro subscription, you get additional measurement tools (square feet, mile, acreage, radius and so on), so simply select the points on the screen using your mouse and let Google Earth calculate the rest.
Create visually powerful presentations
Export high-resolution images up to 11" x 17" (4800 pixels, sample print - 890k), and use them in documents, presentations, web or printed materials. Your audience can come along for the ride as you create your own compressed movies (.wmv, sample movie - 13MB) of the zooms and virtual tours you take in Google Earth.
http://earth.google.com/product_comparison.html
Download File
Password : free-gis-archive.blogspot.com
Vertical Mapper 3.0
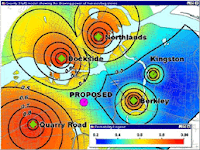
 Enhance geographic data analysis and visualization with the power of grids. Working seamlessly within MapInfo Professional, Vertical Mapper is unmatched as an effective tool to display, manage, and interpret spatial information. Optimize the location of broadcast towers, analyze health issues, visualize elevation, model environmental data, target marketing campaigns, determine centres of criminal activity – the possibilities are endless. Vertical Mapper lets you turn data into valuable information for making better decisions.
Key Advantages
 Create Grids
Vertical Mapper features modeling tools and a full suite of interpolators based on all standard estimation principles that let you build continuous surfaces, or grids, from existing point files or unmapped tables, regardless of data type. Easy-to-use wizards help novice users achieve meaningful answers while experienced mappers can adjust advanced settings to obtain more sophisticated results.
Display Grids
Visualize trends in spatial information easily. Vertical Mapper grid colour settings define data variations and dynamic 3D rendering tools let you bring data to life. View multiple grids within the same scene, apply drapes to any open grid, and determine the degree of transparency for both grids and drape files. Vertical Mapper gives you a wealth of display options to generate impressive and intelligent data representations.
Analyze Grids
Enter a whole new world of geographic analysis made possible through grid technology. Whether you need to query and compare multiple layers of information, use complex mathematical expressions to create derivative grids, or perform line of sight analysis with the ViewShed function, Vertical Mapper has robust spatial analysis capabilities that help you gain new insight from your data.
Download File
Password : free-gis-archive.blogspot.com
esri - 3D Analyst
 The ArcView® 3D Analyst™ extension to ArcView GIS software turns
conventional two-dimensional flat maps into dynamic, interactive threedimensional
views. Users can create and display surface data in three
dimensions for analysis and visualization.
ArcView 3D Analyst supports three primary data types for modeling three-dimensional
features—grids, triangulated irregular networks (TINs), and shapefiles (2D and 3D).
Grids and TINs are used to model continuous data or surfaces. Three-dimensional vector
features, where X, Y, and Z values are stored for every vertex, let users capture and
precisely represent geographic features.
Both two-dimensional and three-dimensional data can be viewed in perspective using the
ArcView 3D Analyst 3D Scene Viewer. With the viewer, a user can rotate, zoom in and
out, and pan the data from any angle in a scene.
With ArcView 3D Analyst, users can perform a wide range of activities.
Create realistic surface models from multiple input sources.
Determine height at any location on a surface.
Find what is visible from an observation point.
Calculate the surface area and volume between surfaces.
Work with three-dimensional vector features to make realistic models of the threedimensional
world.
Visualize data in three dimensions.
View in pan and zoom mode as well as interactively tilt and rotate data, featuring
fly-through simulation.
Turn maps into Web-viewable VRML files.
Allow creation of TINs from any combination of point, line, and polygon feature
types or from grids.
Import gridded elevation models including USGS DEMs.
Download File
Password : free-gis-archive.blogspot.com
Esri - ArcView 3.3
 New in ArcView 3.3- application level
* Support for PC ARC/INFO 4.0 double-precision coverages.
* ArcView Projection Utility-- the updated ArcView Projection Utility offers up to three times faster projecting and reprojecting of shapefiles in addition to faster start-up times for the utility (Windows® only).
New in ArcView 3.3- data integration utilities
* SDTS Data Import-- at ArcView 3.3, the SDTS raster import utility has been updated to support the latest raster profile types released by the United States Geological Survey (USGS).
New in ArcView 3.3 - extensions
 * CAD Reader extension-- updated with improved support for AutoCAD® 2000 (Release 15) and AutoCAD 2002 drawing and DXF files (Windows only).
* Database Access extension-- Database Access 2.1d expands the data reading capabilities of ArcView 3.3 by allowing it to connect to the latest ArcSDE spatial data server. The Database Access extension also allows ArcView 3.3 to utilize the ArcSDE Direct Connect configuration option to connect to spatial data in Oracle® or Microsoft®'s SQL Server without an ArcSDE application server being present. Direct Connect with the Database Access extension requires an ArcSDE server connection license.
* ERDAS IMAGINE Image extension-- updated support for ERDAS® IMAGINE® 8.5. The ERDAS IMAGINE Image extension also adds the capability to read pyramid layers. Pyramid layers allow for quick display of very large images. The extension can only read pyramid layers already created for an IMAGINE image. Pyramid layers can be created using ERDAS IMAGINE or ESRI® ArcGIS Desktop products (ArcView 8, ArcEditor 8, or ArcInfo 8).
* NITF Image Support extension-- the NITF Image Support extension has been enhanced to read all images in NTF format as well as rotated NITF images. A sample script to read annotation is also included.
* Report Writer extension-- ArcView 3.3 includes Crystal Decisions' (formerly Seagate) Crystal Reports® version 8.5. Web reports and integration with Microsoft Office are key new features of Crystal Reports 8.5 (Windows only).
Download File : Part1, Part2, Part3, Part4, Part5
Password : free-gis-archive.blogspot.com
Google SketchUp
(Membuat 3d bangunan dan desain semudah mudah nya dan terlihat professional )
Create, modify and share 3D models
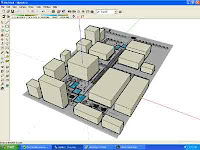
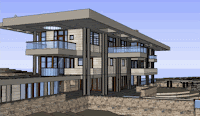
Google SketchUp is software that you can use to create, export and present 3D models. Whether you want to design a new deck for your house, build models for Google Earth, or teach geometry to your fifth-graders, you can use SketchUp to see your ideas in 3D. And when you're done, you can export an image, make a movie or print out a view of what you made.
 Only SketchUp Pro 6 includes LayOut (beta)*,a brand-new tool for creating and sharing professional presentations made from your SketchUp models. LayOut lets you place, arrange, title and annotate SketchUp models, photos and other design elements to assemble presentation graphics and design documentation for print and screen. LayOut lets you work more efficiently by radically reducing the amount of time you have to spend composing and updating 2D presentations.
Download file : Part1 | Part2 | Part3 | Part4
Password : free-gis-archive.blogspot.com
Google Satellite Maps Downloader
What is Google Satellite Maps Downloader
It is a cute tool that help you to get small tile satellite images from google maps. All downloaded small satellite images are saved on the disk. You can view downloaded satellite maps by Satellite Map Viewer. And you can combine them into a big BMP satellite map.
http://www.allallsoft.com/gsmd
How to download?
See the screenshot. It is very easy to use.
Firstly, enter a project name, such like "Mytask.gmid". All project files are saved as *.gmid. If you want to continue a old project, click button "Open project".
There are 4 parameters (Left Longitude, Right Longitude, Top Latitude, Bottom Latitude) to define the area scope of images that you want to download.
The zoom parameter define the image precision.
And you can define how many threads you want to start to download at the same time.
Select a path to save the project and downloaded images, then click button "Download", OK, start downloading now ... !
When downloading, the log window will display the downloading process. When finished, the log will be saved to a file.
Parameters explainment:
1. Left Longitude: -180
Then open a project from menu "File"->"Open project..." to view the map.
How to combine small images into one big image?
After downloading, all small images are saved on your disk. Then you can combine them into one big image map.
We provide a tool : Combine.exe. You can run it from menu "Tools"->"Combine images... ".
The output big image is in BMP format. You can convert it to other format by yourself using some image tools such like PhotoShop.
How to know the longitude and latitude of each image
There are two methods to know the longitude and latitude of every downloaded image.
1. After downloading, the software will create a text file named as "projectname_list.txt" in your project path. In this file all the images' longigude and latitude information are saved.
The file looks like:
ImageFileName Left_Edge_Longitude Right_Edge_Longitude Top_Edge_Latitude Bottom_Edge_Latitude
132778_171956.jpg: 2.34283447265625 2.34420776367188 48.85477632011322 48.85387272790248
132778_171957.jpg: 2.34283447265625 2.34420776367188 48.85567989601490 48.85477632011322
132778_171958.jpg: 2.34283447265625 2.34420776367188 48.85658345560757 48.85567989601490
132778_171959.jpg: 2.34283447265625 2.34420776367188 48.85748699889132 48.85658345560757
132778_171960.jpg: 2.34283447265625 2.34420776367188 48.85839052586622 48.85748699889132
132778_171961.jpg: 2.34283447265625 2.34420776367188 48.85929403653233 48.85839052586622
2. When you view map in Satellite Viewer, the longitude and latitude will be displayed in the statusbar.
And in the log file, the exactly longitude and latitude of the downloaded area are saved as Left Longitude download.., etc.. see the followed example.
An example of log file:
Project: C:\Downloads\paris18.gmid
Log begin...
Now time is:2007-5-4 14:38:41
Left Longitude input= 2.344152
Right Longitude input= 2.355540
Top Latitude input= 48.858895
Bottom Latitude input= 48.854270
MinX = 132778
MinY = 171956
MaxX = 132787
MaxY = 171961
Left Longitude download=2.34283447265625
Right Longitude download=2.3565673828125
Top Latitude download=48.8592940365323
Bottom Latitude download=48.8538727279025
All images' scope information are saved to C:\Downloads\paris18_list.txt
Total count of images would be downloaded: 60
Download threads count: 4
Zoom level: 18
path: C:\Downloads\
Start downloading...
--------------------------------
Thread1:seq=4, file=132778-171959.jpg ->ok!
Thread4:seq=3, file=132778-171958.jpg ->ok!
Thread3:seq=2, file=132778-171957.jpg ->ok!
Thread2:seq=1, file=132778-171956.jpg ->ok!
Download Here
Password : free-gis-archive.blogspot.com
Popular Posts
-
MapInfo location intelligence enables you to answer a fundamental, yet complex question faced by nearly all organizations: Where? It's a...
-
AutoDesk AutoCAD Map 3D 2010 | 3.18 GB AutoCAD® Map 3D software enables engineers, planners, mapping technicians, surveyors, and GIS prof...
-
ArcEngine Developer Kit 9.3 Full | Rapidshare 24 Part ArcGIS 9.3 Engine Developer kit + Runtime Highlights * Support for Visual Stu...
-
Mapinfo MapXtreme 2008 | 124 mB | rapidshare MapInfo MapXtreme can put mapping applications into the hands of anyone with access to a web...
-
Leica GEO OFFICE 8.3.0.0.13017 GNSS - FULL With Leica Geo Office use the most powerful tools all integrated in one common soft...
-
PCI Geomatic 9.1 Full Geomatica Focus – a state-of-the-art work environment that includes a fully georeferenced, file-based visualization to...
-
National Geographic Maps Complete Collection - 8 CD ISO OS: Windows | CD ROM - 8 CDs | 5.06 GB Travel around the globe and through time with...
-
Google Said " Over the last 10 years, businesses, scientists and hobbyists from all over the world have been using Google Earth Pro...
-
ISBN: 0764569333 | Year: 2004 | PDF | 14.6 MB | 408 Pages Basic GPS principles and concepts such as waypoints, routes, tracks, and coordi...
-
Portable Universal Maps Downloader v4.0|| 1.95MB Universal Maps Downloader is a tool that help you to get small tile images from google...


